Windows 11 does not have a built-in hot corners feature.
If you have used a Mac, you may already know what that means: move the cursor to a screen corner, something happens. Show the desktop. Lock the screen. Launch Mission Control. Apple has shipped this for years as a system setting in macOS.
Windows has not. There is no toggle in Settings for “when I push the mouse into the top-right corner, do this.”
That does not mean you are stuck without them. There are a few ways to add hot corners to Windows 11. Some are technical. Some are simple. This article runs through the options and shows how LumoTray handles it if you want a single tool for desktop customization and corner triggers.
What a hot corner actually does
A hot corner is a screen corner that triggers an action when the mouse pointer enters it. No click required. Just push the cursor all the way into a corner and the action fires.
Common hot corner actions:
- Show desktop (minimize everything, get to a file or shortcut).
- Lock the workstation (Windows + L but with just a mouse).
- Open Task View (see all open windows and virtual desktops).
- Start the screensaver.
- Launch an application.
- Run a custom command or script.
Four corners, up to four different actions. The idea is that you do not have to click through menus, use keyboard shortcuts, or find the right taskbar button when you just need to get somewhere fast.
Why Windows 11 still does not have this
Microsoft has not added hot corners to Windows. It is not in Settings, not in PowerToys, and not on any public roadmap.
PowerToys has FancyZones, Mouse Utilities, Keyboard Manager, and a growing list of other tools, but no hot corners utility. Users have been asking for it, but as of mid-2026, it has not shipped.
Users who want hot corners on Windows have three main routes:
- Write an AutoHotkey script.
- Install a dedicated hot corners utility.
- Use a desktop customization tool that includes hot corners alongside other features.
Method 1: AutoHotkey (most flexible, most technical)
AutoHotkey lets you bind mouse positions to actions using screen-coordinate detection. You write a script that watches for the cursor hitting a corner and fires a command.
A basic AutoHotkey hot corners setup looks something like this:
CoordMode, Mouse, Screen
SetTimer, CheckCorners, 250
return

CheckCorners:
  MouseGetPos, x, y
  if (x = 0 and y = 0)
    Send #d  ; Show desktop
  else if (x >= A_ScreenWidth - 1 and y = 0)
    Send #l  ; Lock PC
return
This works. It is also fragile. You have to handle multi-monitor setups, DPI scaling, and edge cases where the cursor slips into a corner by accident. Some users add a brief delay so the action only fires if the cursor stays put.
AutoHotkey is the right call if you are comfortable scripting and want actions that go beyond what a GUI tool offers. It is not the right call if you just want to pick an action from a dropdown and move on.
Method 2: Dedicated hot corners tools
There are a few purpose-built hot corners utilities for Windows:
WinXCorners is a small open-source tool that sits in the system tray and lets you assign an action to each corner. Options include lock workstation, show desktop, open Task View, start screensaver, and launch a program.
HotCornersWin by flexits on GitHub is a lightweight C# tray app with a similar set of actions. It was built for Windows 10 but works on Windows 11, with a few visual quirks.
Windows Hot Corners by bwya77 is another free option. Code-signed, open source, macOS-style corner triggers.
These tools do one thing and do it straightforwardly. The trade-off is that you are adding another tray icon and another app to your startup list. If hot corners are the only thing you need, one of these is a fine choice.
Method 3: LumoTray (hot corners plus the rest of the desktop)
LumoTray is a Windows 11 desktop customization tool that bundles wallpaper management, screensavers, lock screen controls, a custom tray menu builder, and hot corners into one tray app.
The Hot Corners page is simple. You get four corners. For each one, you toggle it on and pick an action.
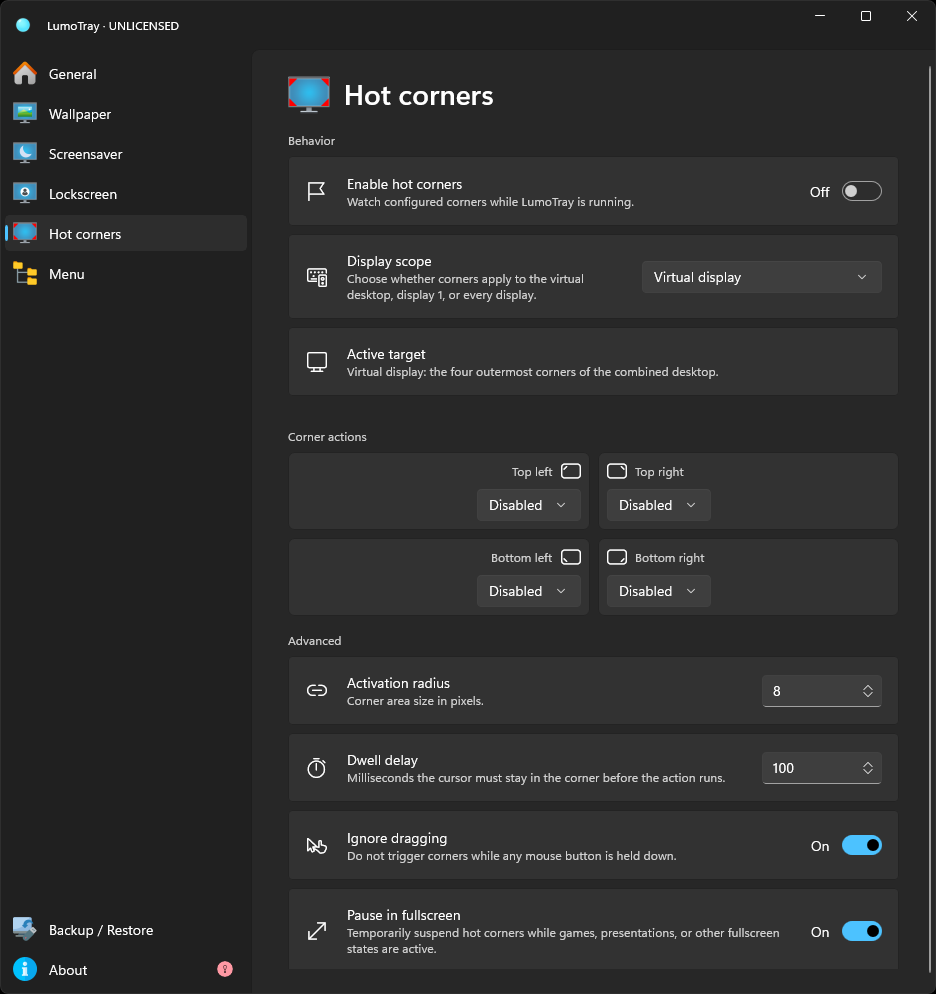
Actions available in LumoTray include:
- Lock workstation
- Show desktop
- Open Task View
- Start screensaver
- Launch an application
- Run a custom command
There is no scripting required. Pick the corner, pick the action, and it works.
Setting up hot corners in LumoTray
- Open LumoTray from the system tray (click the tray icon or double-click it).
- Go to the Hot Corners page.
- For each corner you want to use, enable the toggle.
- Select the action from the dropdown.
- For “launch application” or “run command,” browse to the executable or type the command.
That is it. No config files, no scripts, no separate process to remember to start.
Why this matters more on multi-monitor setups
If you use two or more displays, hot corners get tricky with most tools. The corner detection logic has to account for the full desktop span, including gaps where monitors do not meet perfectly and edges where the cursor can escape to the next screen.
LumoTray handles multi-monitor desktop geometry because it was built for multi-monitor setups from the start. The same tool that manages separate wallpapers per screen also knows where your screen edges actually are.
Combining hot corners with other LumoTray features
The advantage of a single all-in-one tool is that features work together without extra setup. If you are already using LumoTray for multi-monitor wallpapers, the hot corners page is right there in the same app.
A few combos worth mentioning:
- Hot corner to show desktop + LumoTray wallpaper modes. Trigger a quick desktop peek and see your custom wallpaper setup on every monitor.
- Hot corner to lock PC + LumoTray lock screen images. Lock the machine with a corner flick, and the lock screen shows the image you picked in LumoTray rather than the Windows default.
- Hot corner to start screensaver + LumoTray screensaver modes. Push into a corner to fire a clock, Matrix, or slideshow screensaver on a spare monitor.
- Hot corner to launch app + custom tray menu. Use a corner for a frequent app, and keep everything else in a custom tray menu. Different workflows, both accessible fast.
A couple of practical caveats
Hot corners are not for everyone. If you work in full-screen apps most of the day, you are not hitting corners often. If you have a habit of throwing the cursor into a corner when thinking, you will trigger actions by accident unless you set a brief delay.
Most hot corners tools, LumoTray included, let you toggle each corner on or off independently. Start with one corner and one action – show desktop is a common first choice – and see whether it fits your workflow before setting up all four.
On laptops with trackpads, precision matters less because you tend to land near corners naturally when flicking the cursor to the edge of the screen. On large desktop monitors, corners are slightly less reachable but still faster than keyboard shortcuts for many people.
Bottom line
Windows 11 does not have hot corners. You can add them with a script, a dedicated utility, or an all-in-one desktop tool like LumoTray.
If you already use LumoTray for wallpaper management or custom tray menus, the hot corners page is already there waiting. If you are just looking for hot corners, any of the tools mentioned above will do the job. Pick the one that matches how much tinkering you want to do.
Download LumoTray and head to the Hot Corners page to try it.